absolute + (-margin)
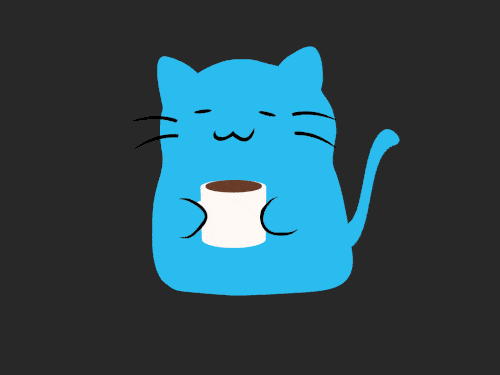
如果元素的宽度和高度已知,我们可以使用至少 3 种方法来使元素居中。例如,在下图中,小猫的宽度和高度分别为 “500px” 和 “366px” 。我们应该如何居中?
用 “absolute + (-margin)” 很容易完成, 代码如下:
1
2
3
| <div class="container">
<img class="cat" src="https://images.unsplash.com/photo-1533743983669-94fa5c4338ec?ixlib=rb-1.2.1&ixid=MnwxMjA3fDB8MHxwaG90by1wYWdlfHx8fGVufDB8fHx8&auto=format&fit=crop&w=1584&q=80" alt="">
</div>
|
1
2
3
4
5
6
7
8
9
10
11
12
13
14
15
16
17
18
19
20
21
| .container {
width: 800px;
height: 600px;
border: solid 1px #e3c1a9;
border-radius: 30px;
position: relative;
}
.cat{
width: 500px;
height: 366px;
border-radius: 50%;
position: absolute;
left: 50%;
top: 50%;
margin-left: -250px;
margin-top: -183px;
}
|
这种方法简单易懂,兼容性好;缺点是我们需要知道子元素的宽高。
absolute + margin auto
我们还可以通过将所有方向的距离设置为 0 ,并将边距设置为自动来使小猫居中。
1
2
3
4
5
6
7
8
9
10
11
12
13
14
15
16
17
18
19
| .container {
width: 800px;
height: 600px;
border: solid 1px #e3c1a9;
border-radius: 30px;
position: relative;
}
.cat{
width: 500px;
height: 366px;
border-radius: 50%;
position: absolute;
left: 0;
right: 0;
top: 0;
bottom: 0;
margin: auto;
}
|
和第一种方法一样,兼容性也挺好,缺点是需要知道子元素的宽高。
absolute + calc
CSS3 带来了 calc 计算属性,它允许我们通过它来居中一个元素,代码如下:
1
2
3
4
5
6
7
8
9
10
11
12
13
14
15
16
| .container {
width: 800px;
height: 600px;
border: solid 1px #e3c1a9;
border-radius: 30px;
position: relative;
}
.cat{
width: 500px;
height: 366px;
border-radius: 50%;
position: absolute;
top: calc(50% - 183px);
left: calc(50% - 250px);
}
|
该方法的兼容性取决于calc的兼容性,缺点是需要知道子元素的宽高。
上面介绍的三种方法必须提前知道元素的宽高,但元素的宽高不确定怎么办?于是就有了flex。
flex
1
2
3
| <div class="container">
<span contenteditable="true" class="content">hello medium</span>
</div>
|
1
2
3
4
5
6
7
8
9
10
11
12
13
14
15
16
| .container {
width: 400px;
height: 200px;
border: solid 1px #e3c1a9;
border-radius: 30px;
display: flex;
align-items: center;
justify-content: center;
}
.content{
padding: 20px;
border-radius: 10px;
background-color: #e3c1a9;
color: #ffffff;
}
|
可以用很少的代码来居中一个元素,是我最喜欢的使用方式。
grid
像flex一样,grid也可以非常方便地用于使元素居中。
1
2
3
4
5
6
7
8
9
10
11
12
13
14
15
16
17
18
| .container {
width: 400px;
height: 200px;
border: solid 1px #e3c1a9;
border-radius: 30px;
display: grid;
}
.content{
align-self: center;
justify-self: center;
padding: 20px;
border-radius: 10px;
background-color: #e3c1a9;
color: #ffffff;
}
|
使用变换,我们还可以在事先不知道元素的宽度和高度的情况下使元素居中。
1
2
3
4
5
6
7
8
9
10
11
12
13
14
15
16
17
18
19
20
| .container {
width: 400px;
height: 200px;
border: solid 1px #e3c1a9;
border-radius: 30px;
position: relative;
}
.content{
position: absolute;
left: 50%;
top: 50%;
transform: translate(-50%, -50%);
padding: 20px;
border-radius: 10px;
background-color: #e3c1a9;
color: #ffffff;
}
|
以上6种方式比较容易理解,在我们的工作中也经常用到,接下来的 4 种方法似乎使用频率较低,但也值得学习。
text-align + line-height + vertical-align
首先,我们可以将 span 的 “display” 属性设置为 “inline-block”。然后通过设置容器的text-align属性为center,span 元素可以水平居中。结合 line-height和其他属性使其垂直居中。
1
2
3
4
5
6
7
8
9
10
11
12
13
14
15
16
17
18
19
20
21
22
| .container {
width: 400px;
height: 200px;
border: solid 1px #e3c1a9;
border-radius: 30px;
text-align: center;
line-height: 200px;
font-size: 0px;
}
.content{
font-size: 16px;
display: inline-block;
vertical-align: middle;
line-height: initial;
text-align: left;
padding: 20px;
border-radius: 10px;
background-color: #e3c1a9;
color: #ffffff;
}
|
css-table
CSS新的table属性让我们可以将普通元素变成表格元素的真实效果,通过这个特性,一个元素也可以居中。
1
2
3
4
5
6
7
8
9
10
11
12
13
14
15
16
17
18
| .container {
width: 400px;
height: 200px;
border: solid 1px #e3c1a9;
border-radius: 30px;
display: table-cell;
text-align: center;
vertical-align: middle;
}
.content {
display: inline-block;
padding: 20px;
border-radius: 10px;
background-color: #e3c1a9;
color: #ffffff;
}
|
writing-mode
过去,我习惯使用writing-mode将内容的布局方向更改为垂直。
但令人惊奇的是它还可以使元素居中。不过这种方法有点难懂,代码量会比较多。
1
2
3
4
5
| <div class="container">
<div class="content-wrap">
<span contenteditable="true" class="content">hello medium</span>
</div>
</div>
|
1
2
3
4
5
6
7
8
9
10
11
12
13
14
15
16
17
18
19
20
21
22
23
24
25
26
| .container {
width: 400px;
height: 200px;
border: solid 1px #e3c1a9;
border-radius: 30px;
writing-mode: vertical-lr;
text-align: center;
}
.content-wrap{
writing-mode: horizontal-tb;
display: inline-block;
text-align: center;
width: 100%;
}
.content {
display: inline-block;
margin: auto;
text-align: left;
padding: 20px;
border-radius: 10px;
background-color: #e3c1a9;
color: #ffffff;
}
|
table(不推荐)
提到它只是作为学习的一个例子,我不建议你在工作中使用它,因为它(在我看来有点)很糟糕。
1
2
3
4
5
6
7
8
9
| <table>
<tbody>
<tr>
<td class="container">
<span contenteditable="true" class="content">hello medium</span>
</td>
</tr>
</tbody>
</table>
|
1
2
3
4
5
6
7
8
9
10
11
12
13
14
15
16
| .container {
width: 400px;
height: 200px;
border: solid 1px #e3c1a9;
border-radius: 30px;
text-align: center;
}
.content {
display: inline-block;
padding: 20px;
border-radius: 10px;
background-color: #e3c1a9;
color: #ffffff;
}
|

 wechat
 alipay